State Management with Redux, Part 3
In this series, I want to go over the who, what, and why of Redux as a tool, separate from React, and then go over the popular combination of React and Redux.
We've made it!
We're now going to implement Redux with React. Last week, we saw how we can use Redux with vanilla JavaScript.
Today, we're going to create a simple React app with Redux based on vanilla JavaScript app. Next week, I'd like to go over asynchronous API calls.
Getting Started
First, we need to create our React app.
npx create-react-app bakery-redux-app

# npx create-react-app my-app <- name your app whatever you want
Next, we'll cd into the directory and start our sever.
cd bakery-redux-app
npm start
Then, we can work on creating our cake component.
Inside our src directory, we'll create a new folder called Components and create a file called CakeComponent.js.
Here's what I created:
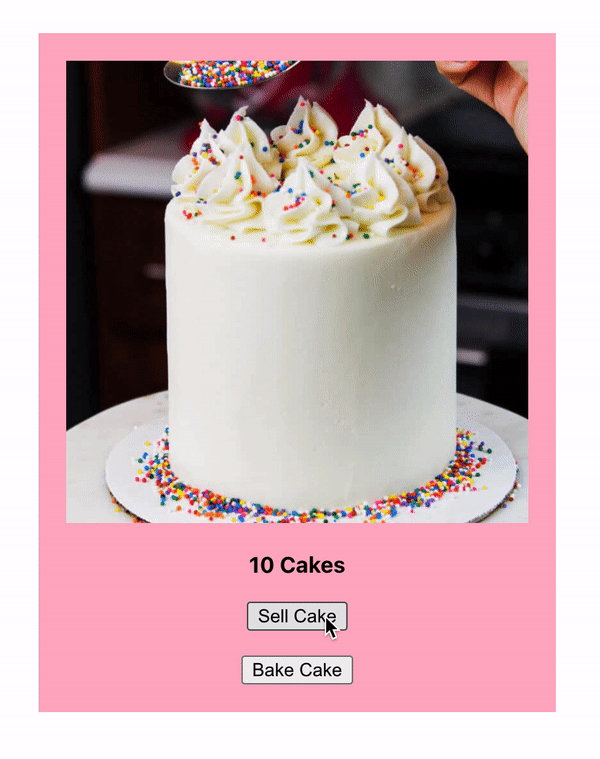
import React from 'react'

const CakeComponent = () => {

    return (
    <React.Fragment>
        <div
            style={{
                backgroundColor: "#FFAFC5",
                padding: "20px",
                width: "25%"
            }}>
            <img src="https://chelsweets.com/wp-content/uploads/2020/04/adding-sprinkles-to-top-of-cake-2-scaled-720x720.jpg" alt="Cake" style={{ "height": "300px" }} />
            <br />
            <br />
            <b>{0} Cakes</b>
            <br />
            <br />
            <button>Sell Cake</button>
            <br />
            <br />
            <button>Bake Cake</button>
            <br />
        </div>
    </React.Fragment>
    );
}

export default CakeComponent
Adding Redux
We're going to install the Redux and React-Redux libraries.
npm install redux
npm install react-redux
We're also going to create our actions and reducers folders.
Actions
actions/cake-actions.js
export const SELL_CAKE = "SELL_CAKE";
export const BAKE_CAKE = "BAKE_CAKE";

const sellCake = () => {
    return {
        type: SELL_CAKE,
    };
};

const bakeCake = () => {
    return {
        type: BAKE_CAKE,
    };
};
In our cake-actions file, we start out by creating our actions types constants. And then, we can create our functions that will return our action objects with the specific type we want to use to invoke a certain behavior in our reducer functions.
Reducers
reducers/cake-reducer.js
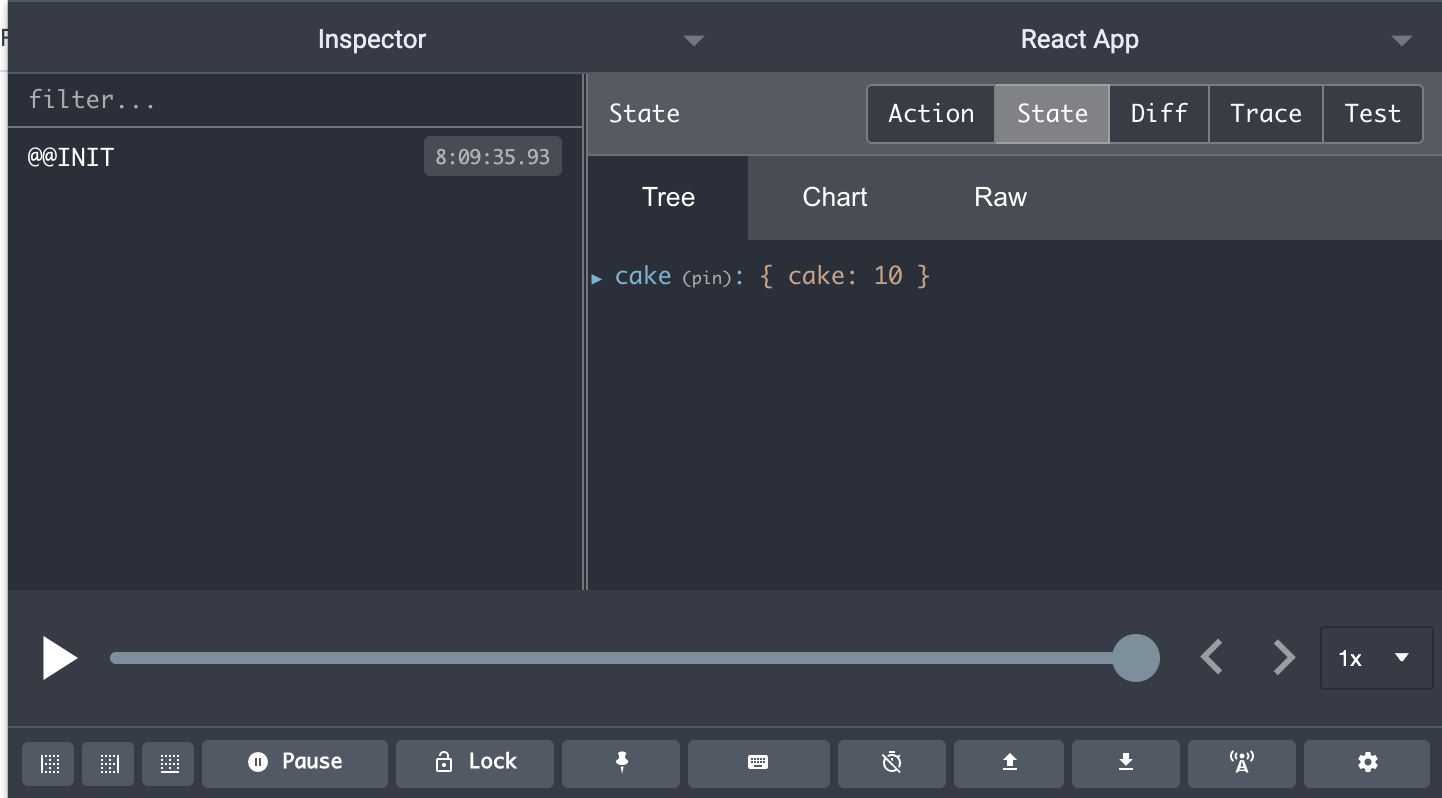
import { SELL_CAKE, BAKE_CAKE } from '../actions/cake-actions'

const cakeInventory = {
    cake: 10
}

const cakeReducer = (state = cakeInventory, action) => {
    switch (action.type) {
    case BAKE_CAKE:
        return {
            ...state,
            cake: state.cake + 1,
        };
    case SELL_CAKE:
        return {
        ...state,
        cake: state.cake - 1,
        };
    default:
        return state;
    }
};

export default cakeReducer
We start by importing the action types and create our state object containing a key with a default value of 10 cakes.
Then, we create our reducer function with a switch/case statement that will invoke certain changes to the state object based on action.type.
reducers/index.js
import { combineReducers } from 'redux'

import cake from './cake-reducer'

export default combineReducers({
    cake
})
We went over this last week, but nothing changed. We imported the combineReducers functions from the Redux library (in case we want to import other reducers like cake).
Create Our Store
import React from 'react';
import ReactDOM from 'react-dom';
import './index.css';
import App from './App';

import rootReducer from './reducers'

import { Provider } from "react-redux";
import { createStore } from 'redux'

const store = createStore(
  rootReducer,
  window.__REDUX_DEVTOOLS_EXTENSION__ && window.__REDUX_DEVTOOLS_EXTENSION__());

ReactDOM.render(
  <Provider store={store}>
    <App />
  </Provider>,
  document.getElementById('root')
);
Inside of our index.js file, we need to import our Provider tags from the react-redux library as well as our createStore function from redux.
Inside our store variable, we use the createStore function and pass in our rootReducer function and our Redux Devtools connectivity.
Note: I added the ability to use the Redux Google Chrome Devtools. You can read more about it here, but it works similar to the regular Google Chrome Devtools. This will be helpful during projects.
Connecting Redux to Our Component
src/Components/CakeComponent.js
import React from 'react'
import { connect } from 'react-redux'

import { bakeCake, sellCake } from '../actions/cake-actions'

const CakeComponent = (props) => {
    return (
    <React.Fragment>
        ...
    </React.Fragment>
    );
}

const mapStateToProps = (state) => {
    return state.cake
}

const mapDispatchToProps = {
    bakeCake,
    sellCake,
};

export default connect(mapStateToProps, mapDispatchToProps)(CakeComponent)
The two imports that we need to make are for the connect higher order component (HOC) from the react-redux library as well as the actions from cake-actions.js file. We also create and pass in two arguments in the connect component, mapStateToProps and mapDispatchToProps.
mapStateToProps returns our state object that we can render in a component. It's not mandatory to use this function if you don't need to render anything from state.
mapDispatchToProps returns a dispatch function that we use to call on actions to re-render state. However, I like to use the ES6 syntax and simply pass in the actions I import via the mapDispatchToProps object.
Bringing It All Together
Here's every thing we put together:
import React from 'react'
import { connect } from 'react-redux'

import { bakeCake, sellCake } from '../actions/cake-actions'

const CakeComponent = (props) => {

    return (
    <React.Fragment>
        <div
            style={{
                backgroundColor: "#FFAFC5",
                padding: "20px",
                width: "25%"
            }}>
            <img src="https://chelsweets.com/wp-content/uploads/2020/04/adding-sprinkles-to-top-of-cake-2-scaled-720x720.jpg" alt="Cake" style={{ "width": "100%" }} />
            <br />
            <br />
            <b>{props.cake} Cakes</b>
            <br />
            <br />
            <button onClick={props.sellCake}>Sell Cake</button>
            <br />
            <br />
            <button onClick={props.bakeCake}>Bake Cake</button>
            <br />
        </div>
    </React.Fragment>
    );
}

const mapStateToProps = (state) => {
    return state.cake
}

const mapDispatchToProps = {
    bakeCake,
    sellCake,
};

export default connect(mapStateToProps, mapDispatchToProps)(CakeComponent)
It's similar to the code earlier, except we are passing information to the component via props. For instance, our mapStateToProps returns state.cake so we can call on props.cake to display the current number of cake available.
Passing in mapDispatchToProps gives us access to the bakeCake and sellCake actions where we invoke via the onClick event handler on the respective button.
Check out the gif below:
Conclusion
Next week, I'll go over asynchronous API calls!